Adasi (Persian Style Lentils)

I began my love affair with lentils a few years ago. We had always been friends but in the past few years my love for these legumes has blossomed.  Lentils are versatile, delicious and extremely nutritious. They are an excellent source of vegetarian protein, fibre, iron, vitamin B and folate. They are low in dietary fat and extremely economical. They are a staple for many vegetarians, as well as omnivores like me that try to adhere to “Meatless Mondays”.

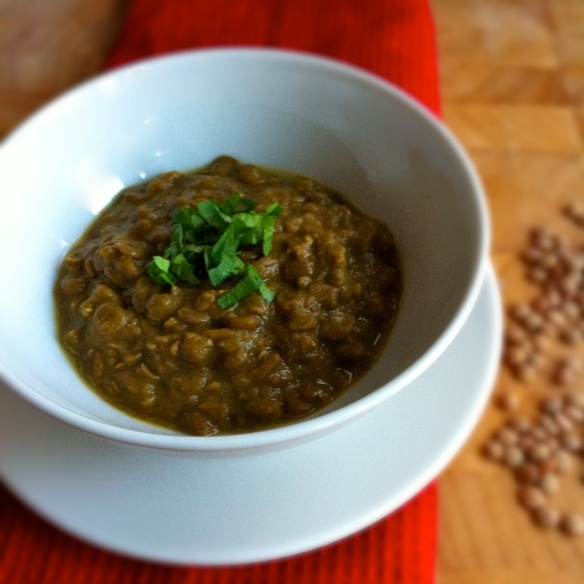
I get a lot of requests for vegetarian/vegan recipes and Adasi is one of my favourite Persian meatless dishes. Lentils with caramelized onions and fragrant spices that can be served hot or cold, as a side dish, a dip, a main dish served with rice or (as my mom grew up with) a delicious breakfast dish.

For those of you unfamiliar with Golpar (Angelica powder) it comes from the seeds of a wild plant that grows in the mountains of Iran. Golpar is very aromatic and is found in a variety of Persian dishes. It is often used with legumes because it reduces the digestive gas that is often associated with eating beans and legumes.

Adasi
(Serves 4)

3 tbsp canola oil
1 large onion, thinly sliced
1 clove garlic, minced
1/2 tsp turmeric
1 cup dried green lentils, rinsed
3 cups vegetable broth (or chicken broth)
1 tsp golpar (ground angelica powder)*
1 tsp ground cinnamon
salt and pepper

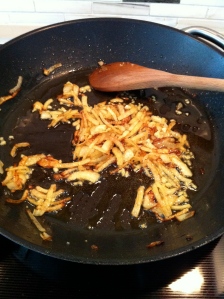
In a medium saucepan heat the canola oil over medium heat. Fry the onions, stirring occasionally until soft and golden, about 10 minutes. Add the turmeric and garlic and fry for another minute.

Add the lentils and vegetable broth to the pot. Turn the heat up to high and bring to a boil. Turn down to low, cover and let simmer (stirring occasionally) for about 1 hour or until the lentils are very soft. If it gets too dry, add some extra water.

The consistency should be thicker than a soup but not too dry. Add the golpar, cinnamon, salt and pepper to taste. Serve warm or cold. Enjoy!

*Can be found at Iranian supermarkets and specialty stores.

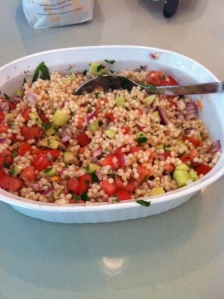
Persian Inspired Israeli Couscous Salad

Also known as my “Peace in the Middle East Salad” or my “Make Love Not War Salad”. When Israel and Iran work together, beautiful things can happen. If only politics could be this easy!  In my modern interpretation of a traditional Shirazi Salad, toasty Israeli couscous meets fresh cucumber, tomatoes, red onions, mint and lime. The result is a delicious, refreshing and hearty middle eastern salad.

I have recently become obsessed with Israeli couscous. It is so versatile and is delicious in warm pilafs and cold salads and is a good substitute for rice, pasta or quinoa. Israeli couscous, also known as Ptitim, is a toasted wheat “pasta” that is shaped into little pearls. It is a very popular dish among children in Israel and is available in whole wheat and spelt for the health conscious. I like preparing it for my daughter with some butter, parmesan and lemon.

This salad is one of my favourite ways to serve Israeli couscous. It is a delicious accompaniment to a variety of grilled meat and fish dishes. I especially love it with Jujeh Kabab!

Persian Inspired Israeli Couscous Salad
(Serves 4-6)

1 1/2 cups Israeli couscous
2 cups water
1/4 cup + 1 tbsp extra virgin olive oil
2 medium tomatoes, diced (1/2 inch pieces)
1 cup diced seedless cucumber (1/2 inch pieces)
1/2 medium red onion, finely chopped
3/4 cup chopped fresh mint
1/4 cup fresh squeezed lime juice (about 2 limes)
1 tsp  salt
1/2 tsp pepper

In a small pot, heat one tablespoon olive oil over medium-high heat. Add the couscous and toast for 5 minutes. Add the water and bring to a boil. Turn down to a simmer, cover and cook for 12 minutes (water should be evaporated and the couscous tender).

Put into a large bowl and add 1/8 cup olive oil. Let cool. When it is cool, fluff the couscous up with a spoon. Sometimes the pearls stick together you might need to spend a few minutes separating them with the back of a wooden spoon.

Add the tomatoes, cucumber, red onion, mint, lime juice, salt, pepper and remainder of the olive oil. Stir to combine.

Refrigerate for at least 30 minutes to allow the flavours to blend. Taste and season with more salt, pepper and lime juice if necessary. Enjoy!

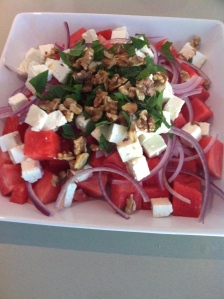
Persian Inspired Watermelon, Feta and Mint Salad

In the last few years I’ve noticed that watermelon and feta salads have been popping up on restaurant menus and at foodie dinner parties. Many are intrigued by this unique and unusual combination of flavours. For me, there is nothing unusual about pairing feta with watermelon……I’ve been eating them together since I was a toddler!

While most of my Canadian friends were eating pancakes and waffles for weekend breakfast, my typical weekend fare was toasted Persian barbarry bread, feta cheese, some sort of accompaniment and a cup of Persian tea. The accompaniment varied… sometimes we ate our bread and feta with dates (my favourite), mint and walnuts, jam (my favourite was Persian carrot jam) or fresh watermelon. When I was young, my brother and I would tear a piece of barbarry, put a little chunk of feta and our favourite topping on it, dip it in our tea and pop it in our mouths. This is still one of my favourite breakfasts ever……although I now refrain from actually dipping it in my tea.

This is my version of a watermelon and feta salad. I love the combination of the sweet watermelon with the salty and creamy feta, refreshing mint and toasted walnuts. Make sure that you buy good feta. I prefer a sheep or goat milk Greek or Bulgarian feta.

Watermelon, Feta & Mint Salad
(Serves 6)

6 cups diced seedless watermelon (1 inch cubes)
1/4 medium red onion, very thinly sliced
200 grams diced sheep or goat milk feta (1/2 inch cubes)
1/2 cup coarsely chopped fresh mint
1/4 cup toasted walnut pieces*
1/4 cup extra virgin olive oil
2 tbsp fresh lemon juice
salt and pepper

Put the watermelon in a large bowl. Add the red onion, feta and mint.

Sprinkle with the toasted walnuts.

Pour the olive oil and lemon juice over the salad. Sprinkle on 1/4 tsp of salt and 1/4 tsp of fresh ground pepper. Toss and serve. Enjoy!

*To toast the walnuts. Place them in a small frying pan over medium high heat. Stir often for about 3-4 minutes or until they start to get fragrant and slightly toasted.

Salad Olivieh (Persian Chicken, Potato and Egg Salad)

There is so much I love about summer: lounging in the sun, a glass of wine on a patio, BBQs, the cottage…….but one of my favourite things about the summer season is going on picnics. When I was young we went on a picnic almost every weekend. It was never a small affair. Many family friends joined us and we always had so much fun. Whenever I go to a park now and see a large immigrant family gathered around a picnic table I get nostalgic.

One of my absolute favourite picnic salads is Salad Olivieh. Although I call it a Persian salad, it is in fact a salad that we have borrowed and adapted from our neighbours in Russia. The original “Salad Olivier” was invented in the 1860s by Belgian chef Lucien Olivier, who was a celebrated chef at one of Russia’s most popular restaurants. The original salad by Chef Olivier contained grouse, veal tongue, caviar, lettuce, crayfish tails, capers, and smoked duck. Over the years the salad has evolved and changed and the modern salad is a delicious mixture of chicken, eggs, potatoes, peas and pickles in a creamy dressing.

I love my mother’s version of Salad Olivieh. It is much lighter and tastier than other ones I have tried. Using a store bought roast chicken makes this recipe much simpler and using waxy potato allows them to hold their shape in the salad and not turn into starchy mush.

Salad Olivieh
(serves 6-8)

1 whole roasted chicken
4 hardboiled eggs*
4 medium potatoes, peeled (preferably a waxy potato such as Yukon Gold)
1 cup fresh or frozen green peas, cooked**
3 green onions, sliced (both white and greens)
1 1/2 cups diced sour pickles (preferably pickles in brine)
1 cup mayonnaise (you may use light if you wish)
1/2 cup white wine vinegar
1/4 cup extra virgin olive oil
salt and pepper

Remove all the meat off the roasted chicken and dice into 1/2 inch pieces. Put into a large bowl.

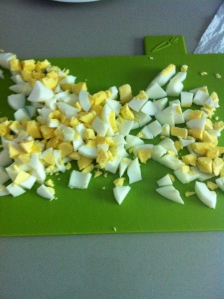
Add the peas, pickles and green onions to the chicken. Peel the shell off the eggs and dice the eggs into half-inch pieces and also add to the salad.

Put the potatoes in a medium-sized pot and cover with water. Bring to a boil and then turn down to a simmer over medium heat. Cook for 30-40 minutes until cooked (use a knife to poke them with to see if they are cooked). Drain and let cool. Dice into 1/2 inch pieces and add to salad.

To make the dressing, whisk the mayonnaise, white wine vinegar, olive oil, 1 1/2 tsp salt and 1/2 teaspoon pepper in a bowl. Pour over salad and gently mix.

Taste and season with more salt and pepper if necessary. Chill for at least one hour.  Enjoy!

*To hard boil an egg: put the eggs in a saucepan and cover with cold water. Bring the water to a boil. When boiling turn down heat to a simmer (medium-low heat) and cook for 10 minutes. Drain. To cool it quickly cover with cold water.

**Cook as per the package directions. Usually boil them for 3 minutes, drain and rinse under cold water to cool them.

Mast-O-Esfanaj (Yogurt with Spinach, Onions and Garlic)

Even as a child I loved spinach. My mother was convinced it was because during her pregnancy with me she took iron supplements and therefore I crave the iron in spinach (I also liked liver as a child!). Whatever the reason, I adore leafy greens. In fact, when I was pregnant with my own daughter, Mast-o-Esfanaj was a major food craving for me. My mother would send over big bowls of it to my house and I would snack on it all the time.

An interesting fact that many might not know is that spinach originated in Persia. The first known references to spinach were in 226-640 A.D.  Arab traders later took spinach to India and then it made its way to Ancient China where it was, and still is, known as “Persian Greens”.

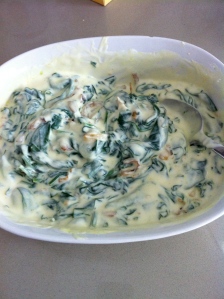
Creamy, savoury and delicious, Mast-o-Esfanaj makes a wonderful appetizer or side dish. Tangy yogurt with wilted spinach, caramelized onion and aromatic garlic. I don’t think I even need to tell you how incredibly nutritious this dish is, but in case you’re in doubt, Mast-o-Esfanaj is filled with essential nutrients and vitamins including vitamin C, vitamin A, vitamin E, vitamin K, vitamin B, folate, iron and fiber from the spinach and calcium and probiotics from the yogurt.

Mast-o-Esfanaj
(serves 4)

4 tbsp canola oil
1/2 large onion, sliced thinly
1 clove of garlic, chopped
1/4 tsp turmeric (optional)
1/2 lb washed baby spinach (or regular spinach chopped)
2 cups yogurt (preferably whole or 2%)
salt and pepper

Heat canola oil over medium heat in a large frying pan. When hot, add the onions and saute for 10 minutes, until soft and slightly golden. Lower the heat to medium-low and add the turmeric and garlic and fry for another 2 minutes. Remove from heat and set aside.

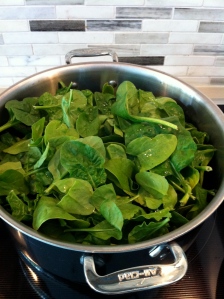
Put the spinach to a large pot and add 1/4 cup water. Turn the heat to medium-high and cover. Stir every once in a while until spinach is cooked and wilted, about 5-10 minutes.

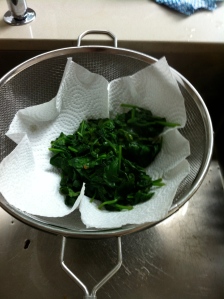
Line a sieve with paper towel and drain the spinach. Try to squeeze as much liquid out as possible.

Let the spinach cool. In a large bowl, combine the spinach, yogurt and the fried onion and garlic. Taste and season with salt and pepper. Refrigerate for at least 30 minutes. Enjoy!

Kashk-e Bademjan (Creamy Persian Eggplant Dip)

I’m an eggplant fanatic. Fried, baked, grilled, barbequed, breaded……you name it, I love it. Fortunately, Persian cuisine is an eggplant lovers paradise. If I had to pick my favourite Persian eggplant dish it would be a tight race, but I think Kashk-e Bademjan would have to be the winner. Creamy and garlic-y with caramelized onion and tender, fried eggplant, this dip is ridiculously delicious. It has ruined many Persian restaurant lunches for me as I can not resist ordering it and eat so much that I have no room left for Kabab!

For those of you who don’t know, kashk is whey – the liquid remaining after milk has been curdled and strained in the cheese-making process. In North America, most people’s familiarity with whey is in the form of whey protein for protein shakes. In the Middle East, whey (or kashk as we call it in Farsi), is used a great deal in cooking. It provides  a wonderful flavour and a creamy consistency to a lot of dishes. Kashk and eggplant are a wonderful complement to each other. The following is the Kashk-e Bademjan recipe my mother taught me, which I believe is superior to any restaurant version I’ve had!

Kashk-e Bademjan
Serves 4-6

6 Japanese eggplant (or two large regular eggplant)
1 large onion, thinly sliced
canola oil
1 tsp turmeric
6 cloves garlic, chopped
4 tbsp kashk (whey)*
salt and pepper

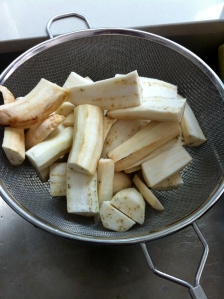
Cut the top off the eggplant, peel them, slice them in half lengthwise and cut them into three-inch pieces. Put them in a colander and liberally sprinkle salt on them to remove any bitterness. Leave them for 30 minutes – 1 hour.

In a large frying pan, heat 4-5 tablespoons of canola oil over medium-high heat. Fry the onions, stirring occasionally until golden (about 10 minutes). Add the turmeric and fry for another minute. Remove from heat.

In another pan (or you may temporarily remove the onions and use the same pan), heat about 1/2 cup of canola oil over medium-high heat. Rinse the eggplant and pat completely dry. Fry the eggplant in batches until golden on each side (2-3 minutes).  You may need to add more oil as you go.

When done, add all the eggplant back in the pan along with the fried onions and garlic. Add 1/2 cup water and fry the mixture for 1 minute.

Turn down the heat to medium-low, cover and continue cooking (stirring occasionally) until eggplant is very tender (15-20 minutes). When tender, use the back of a wooden spoon to mash the eggplant. It does not need to be completely smooth.

Turn off the heat and stir in the kashk until well incorporated and creamy. If you would like it creamier, add more kashk. Taste and season with salt and pepper.

You may garnish with walnuts, fried onions and drizzled kashk if you wish. Serve with toasted barbarry bread, pita or lavash. Enjoy!

*You may purchase kashk at Iranian supermarkets and specialty stores. If you can not find kashk, you can try substituting full fat sour cream. It will not have exactly the same flavour but it will still be delicious!
Mast-O-Khiar (Yogurt with Cucumber and Fresh Mint)

In the West, yogurt is mostly eaten sweetened with fruit, sugar or honey. I have to admit I’ve never been a fan. It has always puzzled me why anyone would want to mask  the amazing tart  flavour of pure, delicious plain yogurt. I’ve even tried the whole greek yogurt, fruit and honey thing……it just doesn’t work for me.  Personally, I prefer to celebrate yogurt natural flavour with fresh and savoury ingredients.

Persians, like many other Eastern cultures, do not consume a great deal of dairy. But the one exception is yogurt. Yogurt is a staple in Iranian cuisine. I have fond memories as a child of watching my grandmother making vats of homemade yogurt when she would visit from Iran. There really is nothing like homemade yogurt and I have made a promise to myself that one day I will attempt to make it.

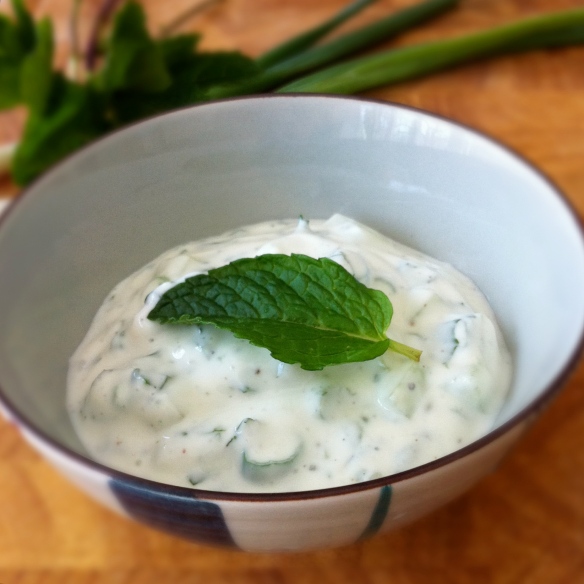
Mast-o-Khiar is a traditional Persian yogurt dish made with fresh mint and cool cucumber. Growing up, my mother made this dish with dried mint but over the years has changed her recipe to include fresh mint  and sometimes adds other herbs such as tarragon, chives and basil. Some people prefer to add walnuts or rose petals, while others even include raisins. Personally, my favourite is the simple fresh flavours of the mint, cucumbers and green onions.

Mast-o-Khiar makes a wonderful appetizer, side dish or even a dip for vegetables or bread. I often keep it in my fridge and have it as a healthy snack. In the summer months, my mother sometimes thins the yogurt with bit of ice water and it makes a delicious and refreshing cold soup.

Mast-O-Khiar
(serves 6)

1 750 gram container of plain yogurt (full fat or 2% preferred….my favourite is Liberte Organic 2%)
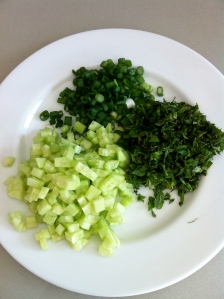
1 seedless english cucumber, peeled and diced finely
2 green onions (green & white parts), sliced thinly
¾ cup chopped fresh mint leaves
½ tsp salt
¼ tsp pepper

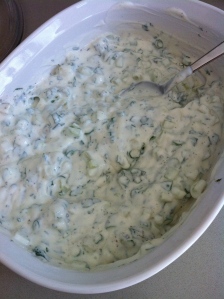
Mix all the ingredients together in a large bowl.

Taste and season with more salt and pepper if necessary.

Serve chilled. Enjoy!